
Understanding Skin Whitening Soap
Skin whitening soap has gained popularity as a means to lighten the skin and reduce the appearance of dark spots, blemishes, and uneven skin tone. These soaps typically contain ingredients known for their skin-lightening properties. When making your own, you have control over the ingredients, ensuring they are natural and suitable for your skin type. The process involves saponification, a chemical reaction where fats and oils react with a strong alkali (lye) to produce soap.
What is Skin Whitening
Skin whitening, also known as skin lightening or bleaching, is a practice aimed at achieving a lighter skin tone. This can be for various reasons, including cosmetic preferences or to address hyperpigmentation issues. Skin whitening products work by reducing the production of melanin, the pigment responsible for skin color. It’s important to understand that skin whitening doesn’t change your natural skin type, but it can reduce the appearance of existing pigmentation.
Why Make Your Own Skin Whitening Soap

Making your own skin whitening soap offers several advantages. Firstly, you control the ingredients, allowing you to avoid harsh chemicals and potential allergens often found in commercial products. This also gives you the ability to customize the soap to your specific skin type and needs. Furthermore, making your own soap can be a cost-effective and rewarding hobby, providing a sense of accomplishment and a unique product. Plus, you can be sure of the soap’s origin and processes used during creation.
Ingredients for Skin Whitening Soap
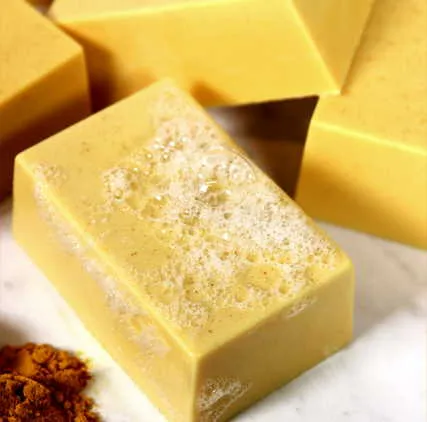
The choice of ingredients is critical for effective skin whitening soap. Common ingredients include various oils and fats for the base, such as olive oil, coconut oil, palm oil, or shea butter. Additionally, certain ingredients are included for their skin-lightening properties. These components work in harmony to cleanse the skin, lighten dark spots, and promote an even skin tone, giving you that radiant look. Carefully select ingredients to align with your skin type and preferences.
Essential Oils for Skin Whitening
Essential oils can enhance the effectiveness of your skin whitening soap, offering both therapeutic benefits and pleasant fragrances. Some essential oils known for skin-lightening properties include lemon, which contains Vitamin C; tea tree, known for its antiseptic properties; and frankincense, which promotes cell regeneration. It is important to use essential oils in the correct proportions, typically 1-3% of the total soap weight, as highly concentrated oils can be irritating to the skin. Also, always dilute essential oils in a carrier oil to prevent any adverse reaction.
Other Natural Ingredients

Besides essential oils, other natural ingredients can boost your soap’s skin-whitening capabilities. Ingredients such as licorice root extract, known for inhibiting melanin production; kojic acid, a byproduct of fermented rice; and turmeric powder, known for its anti-inflammatory and antioxidant properties, are very effective. These ingredients can be added in small quantities, usually as a percentage of the total weight of the soap, and are blended into the soap mixture during the trace stage. Always remember to research and properly incorporate these ingredients into your soap recipe.
Step-by-Step Guide to Making Skin Whitening Soap
Making skin whitening soap involves several steps, each crucial to the final product’s quality and effectiveness. Safety is paramount, so you must wear protective gear, including gloves and safety glasses, at all times. Accurate measurements and the proper handling of lye are fundamental, as errors can compromise your results. Patience is also necessary, as the curing process takes time. Follow these steps, and you’ll be well on your way to making safe and effective skin whitening soap.
Preparing Your Workspace and Materials
Before starting, organize your workspace, covering it with newspaper or plastic to protect surfaces. Gather all necessary tools, including a digital scale for precise measurements, heat-safe containers for mixing, and a stick blender to accelerate the saponification process. Keep all ingredients, including oils, lye, and additives, within easy reach. Ensure that your work area is well-ventilated to prevent the buildup of lye fumes. Additionally, have a backup plan, such as a sink or a place to cool down in case of an emergency.
Mixing the Lye Solution Safely

The process of mixing lye with water is an essential but potentially hazardous step. Always add lye slowly to the water, never the other way around, and stir constantly to prevent overheating and splashing. Perform this step in a well-ventilated area, and wear your safety gear. The mixture will heat up significantly; let it cool to the recommended temperature before adding it to the oils. Handle the lye carefully, as it can cause severe burns. Having vinegar ready can help neutralize any spills.
Combining Oils and Lye to Create the Soap Base
Once the lye solution and oils are at the correct temperatures (typically around 100-120°F or 38-49°C), you can begin combining them. Slowly pour the lye solution into the oils, stirring constantly with a stick blender. This process begins saponification, transforming the oils and lye into soap. Continue mixing until the mixture reaches trace—a stage where the soap has thickened and leaves a trail when drizzled from the blender.
Adding Ingredients and Essential Oils
Once the soap mixture has reached trace, you can incorporate essential oils, natural extracts, and other additives. Add these ingredients slowly and mix thoroughly to ensure even distribution. Be mindful of the recommended usage rates of each ingredient. For essential oils, generally 1-3% of the total oil weight is recommended. After adding all the additives, mix the soap thoroughly to ensure an even distribution.
Pouring and Curing Your Skin Whitening Soap

After adding your ingredients, pour the soap mixture into a prepared mold, such as a loaf pan lined with parchment paper. Gently tap the mold to release any air bubbles and ensure the soap settles evenly. Insulate the mold with towels or blankets to retain heat, which helps the saponification process. Let the soap sit undisturbed for 24-48 hours. After this time, remove the soap from the mold and cut it into bars. Place these bars in a well-ventilated area to cure.
Curing the Soap Properly
Curing is the process of allowing the soap to dry and the saponification process to complete. Place the cut soap bars on a well-ventilated rack, ensuring there is space between each bar for air circulation. The curing process can take 4-6 weeks or even longer, depending on the recipe and environmental conditions. During this time, the water evaporates, the soap hardens, and the pH level decreases, making it milder and more skin-friendly. Regular flipping of the bars also ensures even curing.
Tips for Effective Skin Whitening Soap
To make effective skin whitening soap, use high-quality ingredients and ensure you measure them accurately. Properly research the properties of each ingredient, including its skin-lightening effects and compatibility with other ingredients. Maintain a safe working environment, and always prioritize safety when handling lye. Also, patience is key: the curing process is essential to creating a long-lasting, gentle soap. Monitor your skin’s reaction to the soap, and adjust the recipe as needed to suit your skin type and needs.
Testing Your Soap

Before using your soap extensively, perform a small patch test on your skin to check for any adverse reactions. Apply the soap to a small area of skin, like your inner arm, and wait 24 hours to check for any signs of irritation, redness, or itching. If you experience any adverse reaction, discontinue use. Once you’ve confirmed that the soap is safe for your skin, you can gradually start using it on larger areas. Make sure you conduct this test every time you modify a recipe or use new ingredients.
Storage and Shelf Life
Proper storage of your skin whitening soap will prolong its shelf life and maintain its quality. Store cured soap bars in a cool, dry place, away from direct sunlight and humidity. Well-ventilated spaces are ideal. Under proper storage conditions, handmade soap can last for up to a year or longer. If you notice any changes in the soap’s color, scent, or texture, this could indicate that it has expired and should be discarded. Remember that using an old soap can cause skin problems, so do not hesitate to replace your soaps.
Benefits of Skin Whitening Soap
Skin whitening soap offers several potential benefits, including reducing the appearance of dark spots and hyperpigmentation. Regular use may also lead to a more even skin tone and a brighter complexion. Also, when you make your own, you know all the ingredients used, thus reducing the chances of allergens and irritants. However, results vary depending on the soap ingredients, skin type, and consistency of use. Patience and consistency are essential when incorporating this soap into your skincare routine. Always consider your skin’s response, and discontinue use if any irritation occurs.
Precautions and Considerations
When using skin whitening soap, consider several important precautions to protect your skin. Always perform a patch test before regular use to check for any adverse reactions. Use sunscreen daily, as skin-lightening ingredients can make your skin more sensitive to the sun. Be cautious about the concentrations of active ingredients in your soap. Overuse or high concentrations can lead to skin irritation. If you have pre-existing skin conditions, consult a dermatologist before using skin whitening soap. Always do proper research before using it.
Potential Side Effects and How to Mitigate
Like any skincare product, skin whitening soap may cause side effects in some individuals. These could include skin irritation, dryness, redness, or increased sun sensitivity. To mitigate these risks, start using the soap gradually, and use it in moderation. Moisturize your skin regularly to combat dryness. Always apply sunscreen to protect your skin from sun damage. If any irritation occurs, stop using the soap immediately and consult a dermatologist or healthcare provider. Always prioritize your skin’s health and well-being.
Alternative Skin Whitening Methods
If skin whitening soap isn’t your preferred method, other options are available. Chemical peels, laser treatments, and prescription creams can effectively address hyperpigmentation and achieve skin-lightening results. Natural alternatives include using ingredients like lemon juice, honey, or turmeric masks. The best method depends on your skin type, budget, and desired results. Always consult with a dermatologist to determine the most suitable option for your specific skin concerns and preferences. This consultation is essential for achieving your skin-whitening goals safely and effectively.