
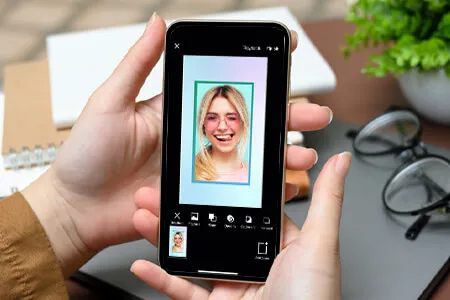
What is a Free Online Teeth Whitening Photo Editor?
A free online teeth whitening photo editor is a web-based tool that allows you to digitally enhance the appearance of your teeth in photos. These editors use advanced image processing techniques to lighten the shade of your teeth, giving you a brighter and more confident smile. Unlike professional dental procedures, these editors offer a quick, convenient, and cost-effective way to achieve a whiter smile in your photographs. They are accessible from any device with an internet connection, making them a popular choice for people looking to improve their photos without expensive software or specialized skills. These tools often include various adjustment options, allowing for customization and achieving natural-looking results. With a few clicks, users can transform their images and boost their self-confidence, making these editors a valuable asset for both casual users and social media enthusiasts. (image: teeth-whitening-editor-intro.webp)
Why Use a Free Online Teeth Whitening Editor?
There are numerous compelling reasons to utilize a free online teeth whitening editor. Firstly, they are incredibly accessible. You can access them from any device with an internet connection, eliminating the need for expensive software or specialized equipment. Secondly, these editors are incredibly user-friendly, with intuitive interfaces that make them easy to navigate, even for beginners. The process is usually as simple as uploading a photo, selecting the teeth whitening tool, and adjusting the settings to your liking. Thirdly, these editors are a cost-effective solution. They provide a way to enhance your photos without spending money on professional services or expensive software licenses. Finally, using a teeth whitening editor allows you to control the outcome, ensuring your teeth appear as bright as you desire. These editors provide a quick and easy way to improve your photos and present your best self to the world. (image: free-online-photo-editor.webp)
Top 5 Free Online Teeth Whitening Editors

The market is filled with free online teeth whitening editors, each offering a unique set of features and benefits. Selecting the right one depends on your specific needs and preferences. Here’s a look at five of the best options available, each with a different approach to image editing and teeth whitening. Consider the ease of use, the range of features, and the quality of the results when making your choice. Make sure to explore the interface of each tool to understand how it works. Look for options that provide a natural-looking result without over-whitening. The right editor can make a big difference in the final look of your photos.
Editor 1 Feature Breakdown
Editor 1 is known for its simple, yet effective, interface. It is designed for users of all skill levels, from beginners to those with some experience in photo editing. The editor’s key feature is its one-click teeth whitening option, which automatically analyzes your photo and adjusts the color of your teeth. The settings are usually adjustable, allowing you to fine-tune the intensity of the whitening effect. Editor 1 also includes additional tools for overall image enhancement, such as brightness and contrast adjustments. The user-friendly interface, combined with its simplicity, makes it an ideal choice for quick and easy teeth whitening tasks. (image: editor-1-screenshot.webp)
Key Features of Editor 1
- One-click teeth whitening
- Brightness and contrast adjustments
- Simple and user-friendly interface
- Fast processing speed
- Basic image enhancement tools
Editor 2 Feature Breakdown

Editor 2 offers a more advanced set of tools for photo editing. Its teeth whitening feature allows for precise control over the whitening process. Users can manually select the teeth area and adjust the color, brightness, and saturation. This editor also provides a range of other editing options, including color correction, red-eye removal, and various filter effects. Editor 2 is a more robust choice for users who want a greater level of control over their photo editing. (image: editor-2-screenshot.webp)
Key Features of Editor 2
- Manual teeth whitening adjustments
- Color correction tools
- Red-eye removal
- Variety of filters
- Advanced editing options
Editor 3 Feature Breakdown
Editor 3 focuses on providing a streamlined editing experience with a clean interface. Its teeth whitening feature is intuitive and easy to use. Users can select the teeth area with a brush tool and apply the whitening effect. Besides, this editor provides other basic image editing options like cropping, resizing, and rotating images. The editor is well-suited for users who value simplicity and quick edits. (image: editor-3-screenshot.webp)
Key Features of Editor 3

- Brush-based teeth whitening tool
- Simple and clean interface
- Cropping, resizing, and rotating options
- Fast and efficient
- Ideal for beginners
Editor 4 Feature Breakdown
Editor 4 emphasizes image quality and offers a variety of tools to enhance photos. Its teeth whitening feature is advanced, allowing for precise adjustments to the teeth’s color and brightness. Editor 4 also provides professional-grade editing tools, including noise reduction and sharpening options, ensuring your photos look polished and professional. It’s an ideal choice for users who prioritize image quality and wish to achieve professional-looking results. (image: editor-4-screenshot.webp)
Key Features of Editor 4
- Precise teeth whitening adjustments
- Noise reduction tools
- Sharpening options
- Professional-grade editing tools
- Focus on image quality
Editor 5 Feature Breakdown

Editor 5 offers a comprehensive photo editing experience with a unique approach to teeth whitening. Its teeth whitening tool is integrated with AI technology, which automatically detects teeth and applies the whitening effect. This editor also includes a wide range of other tools, such as skin smoothing and background removal. Editor 5 caters to users who want an all-in-one photo editing solution. (image: editor-5-screenshot.webp)
Key Features of Editor 5
- AI-powered teeth whitening
- Skin smoothing tools
- Background removal
- Comprehensive editing options
- All-in-one solution
Step-by-Step Guide Using a Free Teeth Whitening Editor
Using a free online teeth whitening editor is generally a straightforward process. These steps will guide you to brighten your smile in your photos. Remember that the interface and features might vary slightly depending on the specific editor. However, the basic steps remain consistent. Take the time to familiarize yourself with the editor’s features, as this will enable you to produce the best results. A little practice will help you master the tools and produce natural-looking teeth whitening.
Uploading Your Photo

The first step in using a free online teeth whitening editor is uploading the photo you wish to edit. Most editors allow you to upload images directly from your computer or, in some cases, from cloud storage services. Select the photo you want to edit and click the ‘upload’ button. Make sure you choose a photo with clear visibility of the teeth for the best results.
Selecting the Teeth Whitening Tool
Once your photo is uploaded, you’ll need to find and select the teeth whitening tool. This tool might be represented by an icon of a toothbrush or a set of teeth. Click on the tool to activate it. The tools can work in various ways, from automatic adjustments to manual settings. Experiment to see what settings are available in the editor you’re using.
Adjusting Brightness and Contrast
After selecting the tool, the editor will provide options to adjust the brightness and contrast of the teeth. Start by making small adjustments and previewing the result. Some editors have a slider that gradually whitens your teeth. Keep your changes subtle for natural-looking results. Be mindful to avoid over-whitening, which can appear unnatural. (image: teeth-whitening-before-after.webp)
Saving and Sharing Your Edited Photo

Once you are satisfied with your edits, it’s time to save and share your photo. Most editors provide an option to download the edited image to your computer. Additionally, you can often share your photos directly to social media platforms like Facebook and Instagram. Before saving, make sure to check the quality and resolution settings to ensure your photo looks its best.
Tips for Natural-Looking Teeth Whitening
Achieving natural-looking teeth whitening in your photos requires a delicate balance and a few important considerations. The goal is to enhance your smile subtly, rather than creating an unrealistic appearance. Begin with small adjustments and avoid the temptation to overdo it. Remember, a natural look is the key to believable results. With a bit of practice and these tips, you can confidently enhance your photos and bring out the best in your smile.
Avoid Over-Whitening
Over-whitening is one of the most common pitfalls in digital teeth whitening. If the teeth appear too bright or unnaturally white, the effect will seem fake and detract from the overall image. The best strategy is to make small, incremental adjustments to the brightness and color. Always preview your results and make sure the color complements your skin tone and the rest of the image. Aim for a slight enhancement rather than a drastic transformation.
Consider the Overall Image
When editing your photos, consider the overall look of the image. The color and brightness of your teeth should harmonize with the lighting and color balance of the photo. If the image is warm-toned, consider a slightly warmer shade for your teeth. If the photo is cool-toned, a slightly cooler shade might work better. Make adjustments to the image’s brightness and contrast to complement the teeth whitening. Balancing the image ensures the teeth whitening effect looks consistent and natural, enhancing the overall aesthetic.
Comparing Free Online Teeth Whitening Editors
When choosing a free online teeth whitening editor, it’s important to consider several factors. Different editors offer varied features, interfaces, and levels of user-friendliness. Assessing each editor’s capabilities will help you select the one that best suits your needs. Consider factors like ease of use, the variety of tools, and the quality of the final output. The best choice depends on your experience level and desired outcome. Below is a comparison of a few features to help you make the best decision.
Editor 1 vs Editor 2
Editor 1 offers a simple, user-friendly interface with one-click teeth whitening, making it ideal for beginners. Editor 2 offers a more complex experience with manual adjustments for precise control. If you value ease of use and quick results, Editor 1 is a good choice. For more control and advanced options, Editor 2 may be better. Editor 2’s more advanced features come with a steeper learning curve. Consider how much time you’re willing to invest in the process.
Editor 3 vs Editor 4
Editor 3 provides a streamlined experience with a clean interface and a brush-based whitening tool. Editor 4 focuses on image quality with professional-grade tools such as noise reduction and sharpening. If you are looking for a quick and intuitive editing experience, Editor 3 will work. For high-quality output and advanced image editing, Editor 4 is the better choice. The level of quality you need should decide the best editor for you.
Editor 5 strengths
Editor 5 stands out with its AI-powered features. It offers an automated teeth whitening process along with other useful tools. For users who want an all-in-one photo editing solution with advanced automated capabilities, Editor 5 is an excellent option. If you prefer AI-driven editing and a variety of tools within a single platform, Editor 5 could be your best bet. This editor’s comprehensive design can save you time and give you the desired result.
Conclusion the Best Free Online Editor for You
Choosing the best free online teeth whitening editor depends entirely on your needs and preferences. Consider your level of experience and what features are most important to you. If you’re a beginner, Editor 1 and Editor 3 offer simple interfaces and easy-to-use features. For more advanced users seeking precise control, Editor 2 and Editor 4 provide more sophisticated editing tools. Editor 5 is a great option if you want an all-in-one solution with AI-powered features. By evaluating these options, you can find the ideal editor to achieve a brighter, more confident smile in your photos. (image: teeth-whitening-before-after.webp)